Here is a brief description of how I sand my bowls.
I first began using soft disc sanding when I was introduced to it in a workshop on stack laminated furniture around 1983 with Doug Sigler. Then about 1985 I took a workshop with David Ellsworth and he extolled disc sanding virtues even further. We're talking rpm's. Sanding while the bowl is stationary allows you to deal with voids, the natural edges, out-of-round bowls, and end grain. Over the years I have refined various aspects of the soft disc sanding and have ending up with a system that works fairly well. We all wish there was a way to sand faster, if not eliminate altogether, but it is unavoidable for an smooth consistend finished product.
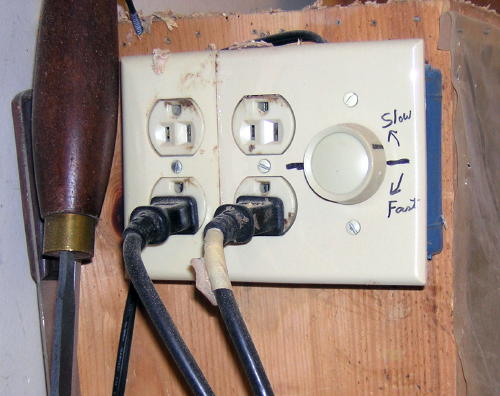
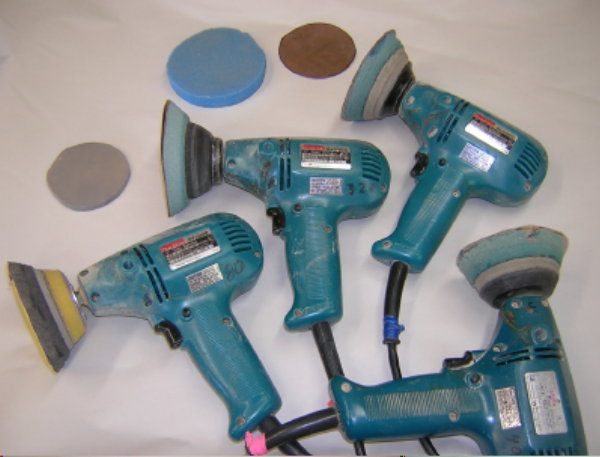
The backbone of my sanding is the Makita GV5000 sander/polisher. It is light and compact, allowing me to hold it close to the head, reducing arm fatigue. You can lock it on so you don't have to keep holding the trigger. It runs at 4000 rpm, way too fast for the foam or sandpaper, so I rigged up a standard household dimmer switch ganged to a duplex outlet and am able to dial in the preferred speed at will: faster with coarser grits, slower for the fine. No more wearing out the switch triggering it on and off to slow the sander down. The dimmer does not seem to harm the sander at all, witness I am still using the old 1984 one daily. I added a second duplex outlet to my dimmer switch, and now can switch back and forth between grits quickly as I work my way through sanding a piece. I believe my general speed is around 2,500 rpm. Some years back I got worried Makita might discontinue the model, and as I had not found anything comparable, I bought a second, a third, and now I have one for each grit. It speeds things up.
If you have two sanders you can alternate which one you switch to a finer grit,
leap-frogging your way to the finest. For example, sand a bowl with 80 grit,
move to the second sander for 120 grit, and if you come across a spot you missed
pick up the 80 grit to fix it and then go back over with 120 grit. Now pull
off the 80 and put on 220. Sand the whole bowl, and again, if you find a spot
of 80 swirls you didn't quite get off, pick up the 120 and get rid of it. The
220 is pretty good at showing off scratches. Now replace the 120 with 320 and
sand all over with that. Again, you are easily able to pick up the 220 if there
is a spot the 320 can't easily work out. My last pass is with 500 grit It has been my experience that a light
touch with the sander will leave the paper sharper longer and increase the
amount of wood you are able to sand. It is all too easy to bear down on one spot to
get a scratch out, but as the wood and paper heat up the grit is quickly glazed
and the cutting action becomes polishing.
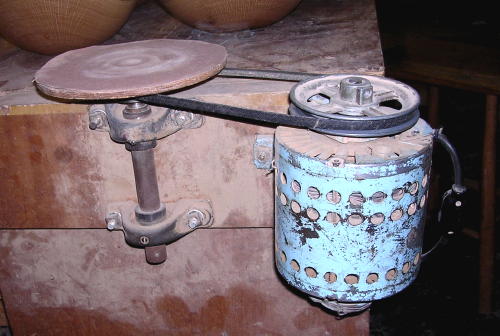
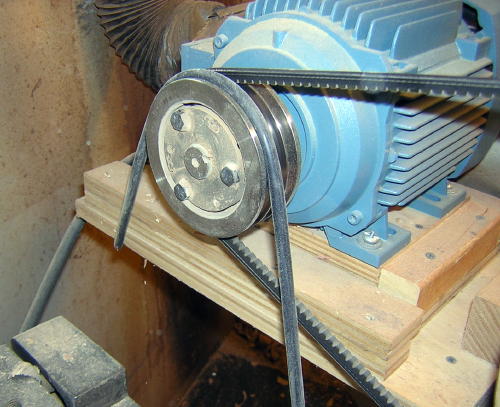
Commensurate with the hand-held sander is a braking system on the lathe. When I had a variable speed DC motor I found it acted as a brake in the opposite direction it was set to run. This helped hold the bowl in place as I was sanding. When I switched to variable speed AC motor I lost this feature. But then I passed a length of 3/8" O.D. rubber gas line from the auto parts store around the 4" drive pulley, and voila, a slip brake in both directions, easy to nudge forward with a hand but firm enough to resist the torque of sanding. I upgraded to a triple drive pulley so a groove is always available to drop the rubber over for sanding. A real advantage to this system is it frees up both hands to hold the sander. This greatly reduces the stress on the forearm that I found left me aching after a period of one-armed sanding. Plus, using two hands you are able to "float" the sander in your hands as you arc back and forth over the complex curves of a bowl, as well as gently sand around the top or the bowl to ease the sharp edges.
Here is the sanding brake adapted to a Powermatic 3520
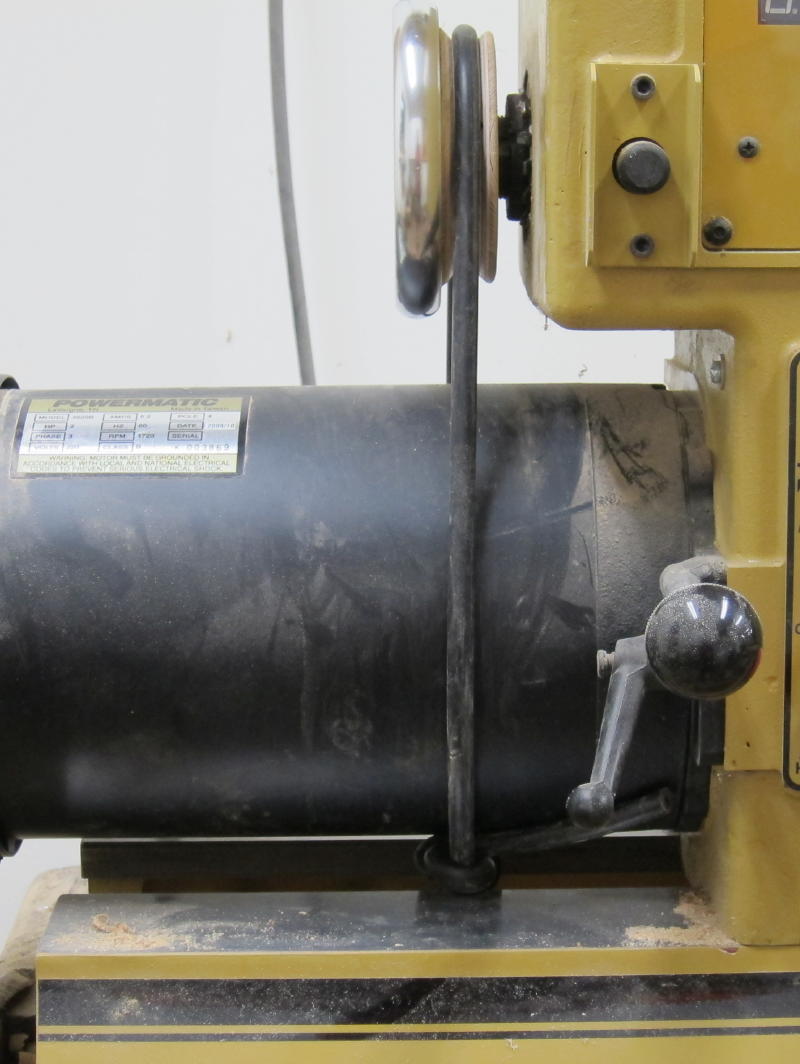
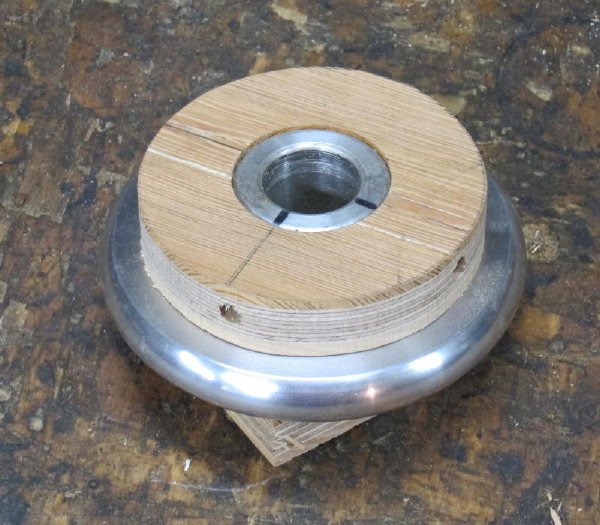
A piece of multi-veneer plywood is fitted to the handwheel and set-screwed firm.
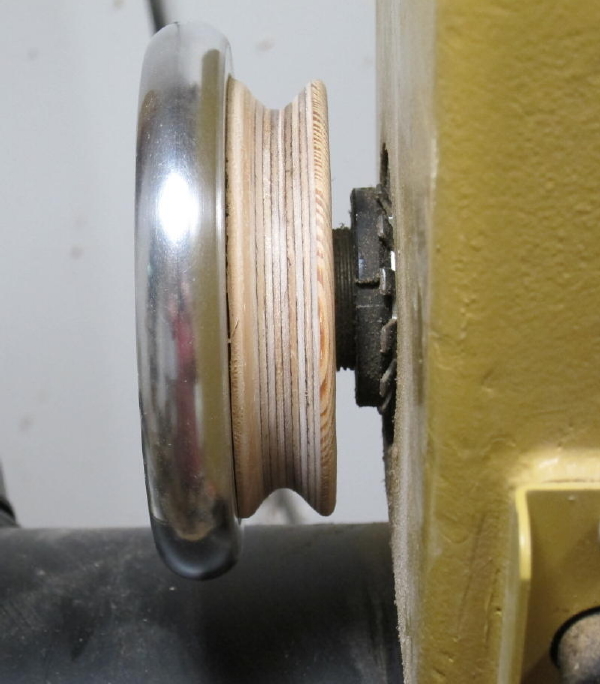
And then with the lathe running a groove for the friction tubing is turned.
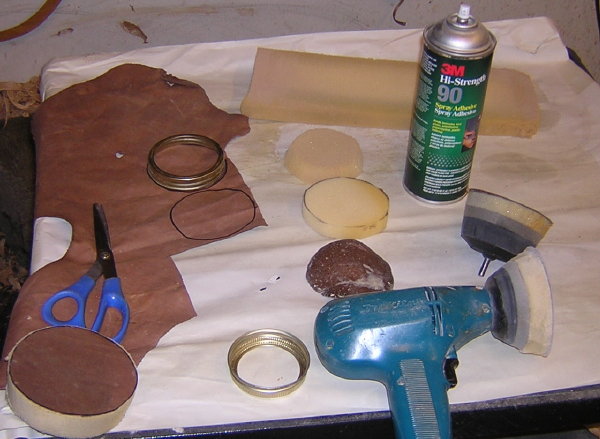
The Basic Sanding System
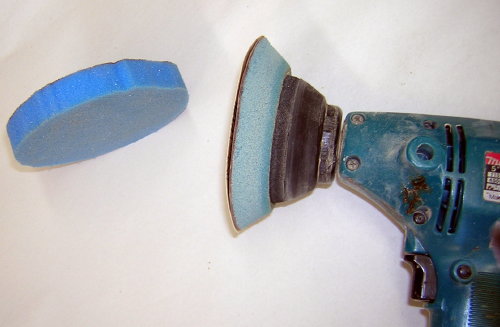
I use a
foam-backed leather-faced sanding system. I use the thinnest leather I can
find, 0.03"-0.04" thick (0.5 - 0.8 mm). You glue the smooth
tanned side up. A durable foam of correct density may be bought from
foamorder.com. Go to mattress foams, then conventional
shapes, and choose rectangle:
http://www.foamorder.com/custom_cuts.php?product=conventional&shape=1
It is easy to enter a size such as .75” x 24” x 24”, and get a list of types,
their prices, and descriptions. I tried numerous types, and found the best for my sanding purposes
to be the DuraFlex D44, with a density of 2.25 lb/ft3, and ILD 40. It used to be the only
blue one on the page, but my last batch was yellow. A 2’ square piece 3/4"
thick runs
about $8.25 + shipping. Now they offer D4 and D50, I expect D50 is
the way to go.
For the denser grey foam that is applied below the DuraFlex D44, I use the EVA
closed cell foam, available at Foamorder at
http://www.foamorder.com/closedcell.html A .2' square piece 1/2"
thick runs $12 plus shipping.
The 3M 90 does not degrade the foam, though it does slowly de-bond after
heavy use. But at that price, no problems. Just gluing on another piece when
it gets too worn.
I used
to use 3M 77 Spray Adhesive to glue the foam to sander, leather to foam, but I find the 3M 90
considerably superior in ease of application, tenaciousness of grip, and in
resistance to heat. It is well worth the extra dollars. Insist on it. Spray
both sides and wait a minute or so until it is no longer wet but not altogether
dry, and press together. I can use it after only a few more minutes, though it
is better to give it half an hour. If the sander catches on an edge or in a
crack and begins to rip loose, spray the 90 into the folded back leather, wait,
and press to resume sanding. But after you do this a few times the glue
becomes too thick and stiff for smooth sanding. When it comes time to replace the foam I take the time to sand the 3M
90 off the leather on the stationary belt sander before re-applying.
I prime
the leather with a thin film of the 3M Feathering Disc Adhesive which is good
for the life of the leather. If anything the grip is too strong. You
have to peel the paper off carefully to avoid damaging the leather/foam
connection. A light pass with a propane torch will soften the glue to release it
from the leather. If the sandpaper sticks too tight, dusting the leather surface with the dust
on your palms before putting on the next piece of sandpaper will help.
I have been using 3M Gold, but
now I use Mirka Gold, which seems to have much more consistent grit
with way fewer deep scratch marks left over moving from one grit to
a finer grit. You can find it on
Amazon.
I usually start with 100 grit, the move to
120, 220, 320, and finally 500 grit. If the wood is hard and
the cut clean I can start with 120 grit. It is very seldom
that I can start with 220 grit. It is quicker to use 120 to
get things even, then move on to the 220 grit. Each successive grit
takes less time.
To see the step by step process of making a custom sander, go to the
Custom Sander page.
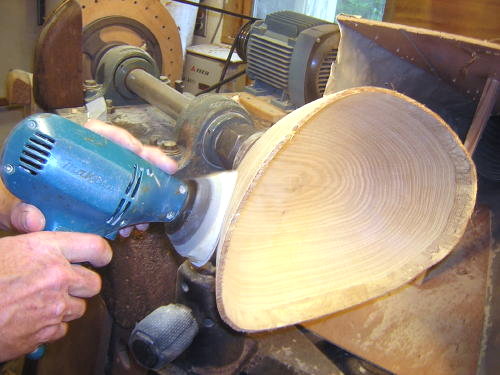
Finally, although not a physically jolting as
using the gouge, sanding can be quite hard on the joints and can make your arms
ache. It is important to hold the sander as loosely as possible and to
avoid tensing or hunching over the work. Having a sander that has a
lock-on button is important, for it frees you up to hold the sander with both
hands in the best way possible to loop freely over the rounded surface of the
bowl using both arms and the whole body, not just one arm locked tight to the
shoulder. My photo does not quite catch the effect, for I am not holding
the trigger on though my finger is in the area. You can see the flex of
the foam melding to the bowl in this older shot.
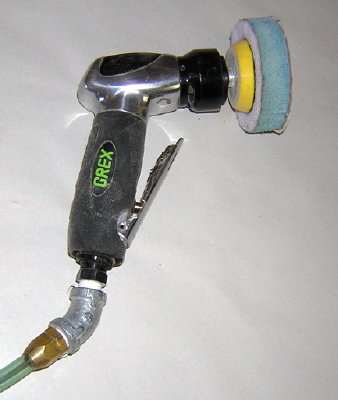
After 500 grit on the Makita I go to a Grex random orbital sander to which I have some blue foam attached by hook and loop, again with leather for the upper surface. I put 500 grit on this, and find it does an excellent job of taking out swirl marks.
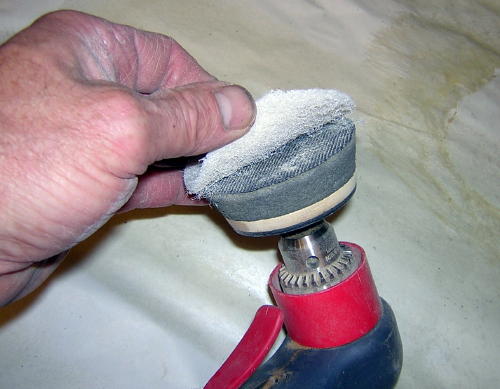
After stationary sanding to finest grit I go to ScotchBrite. On a round bowl this is easy with the bowl spinning, but on a natural edge bowl you have to rub some parts by hand. Then I tried sticking some to a hook and loop disc and found it a great improvement. The soft foam 3" dia disc sold by The Sanding Glove mounted on a high speed Sioux 45 deg. angle head drill makes a fine final polisher for any kind of bowl. I start with 3M grey-green fine #7448, then go to the gold very fine #7745, and end up with the white ultra fine #7445 than buffs. This sequence almost polishes the bowl at the end, and can be effectively used to buff out blemishes and scratches later on. It seems to blend the Behlen's Salad Bowl Finish right over the offending area. For more aggressive buffing at the start use the maroon 7447, but it leaves visible scratches.
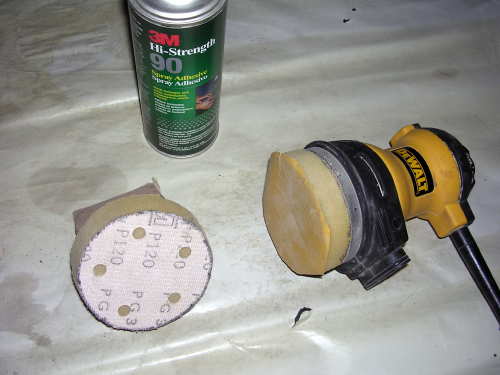
When I have a batch of bowls that have dried and are ready to have the bottoms flattened and signed, that wonderfully sanded surface is all rough from raised grain and has to be re-sanded before the final coat of finish can go on. Even using the Makita with the softest foam and finest grit can leave swirl marks at this stage, and my arm would ache after doing a dozen bowls in a row. So I bought a DeWalt DW423 random orbital sander, removed the dust hood and cut it down to 4" dia. This is hook and loop, so I glued a foam/leather system to a worn piece of hook and loop paper, stuck it on, and put on a piece 600 grit paper. This sander is easy on the forearm because you can hold it right behind the foam. It cuts the raised grain without leaving much of a sanding mark. Such a system may be good for various other uses. After the DeWalt hook grew weak I sanded it off and glued the foam directly to it.
I use a stationary sander to flatten the bottom of bowls…..8" dia plywood disc glued to a pulley mounted to a vertical shaft, running at 1800 rpm. With 80 to 150 grit paper glued on it cuts the warped bottom flat. Those sanding marks are then removed with the flexible foam sanders.