Here are a few images of some turning innovations I have
come up with that really work for me.
A Quiet Dust Collection System
First of all, the dust collector. This is built around a recycled HVAC
squirrel cage fan taken from a dumpster. These fans are wonderfully quiet
compared to all the paddle wheel ones on the market, but they require large
ductwork, for their air flow drops dramatically if there is a load. I use
the Oneida pleated filter on it, and the pan on the bottom is so easy to clean.
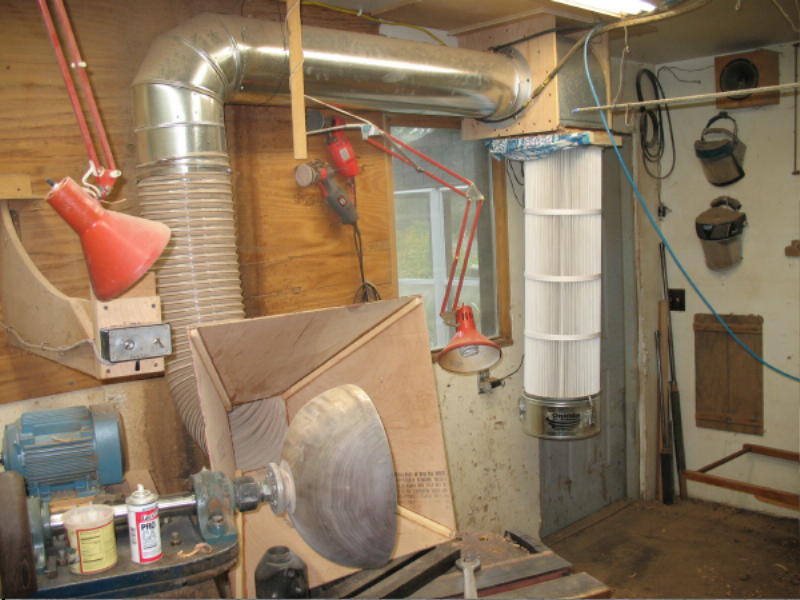
The collector system as a whole. All heat or coolness stays in the shop.
The blue curtain pulled up for the photo keeps the shavings out of the pleats.
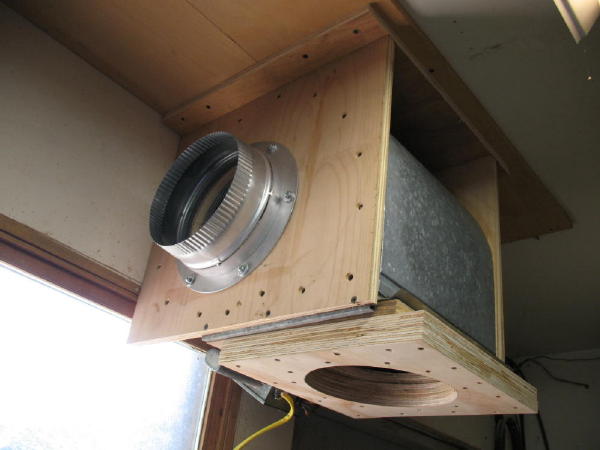
The 220V HVAC fan with plywood adaptor panels, close up.
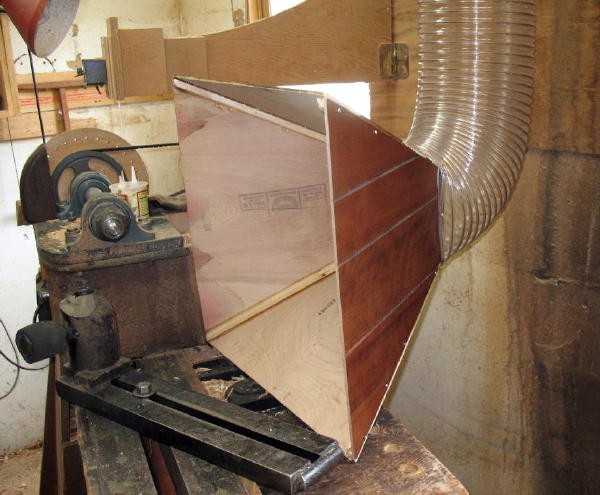
The 1/4" plywood cone and 10" ducting.
Having a large cone is vital to efficiency of the system.
Calipers
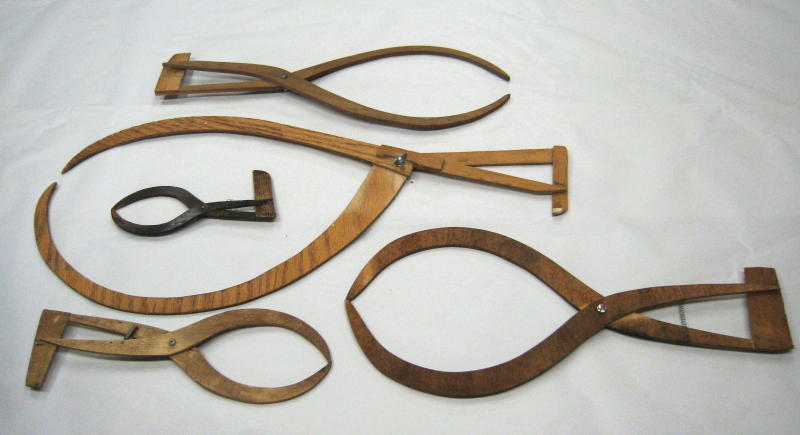
Here is a set of wooden calipers
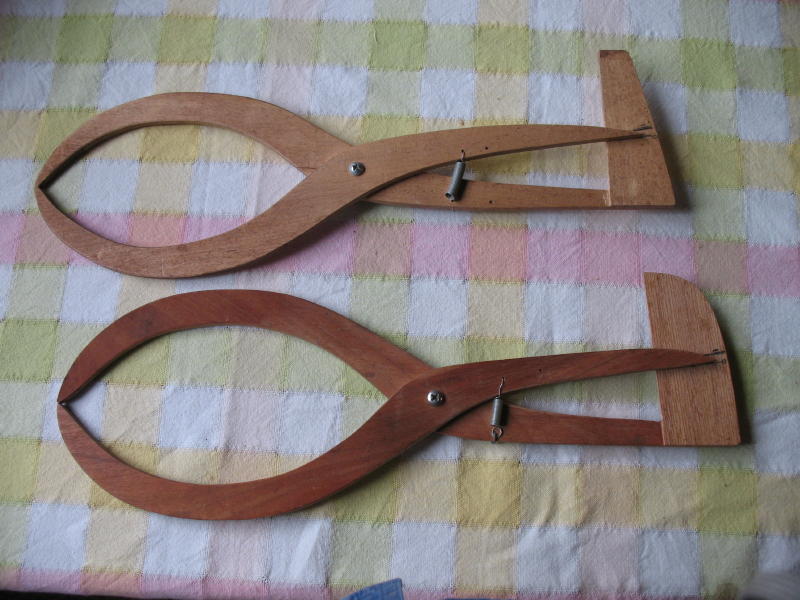
Wooden calipers, 6" throat. Notice reference marks on the right side.
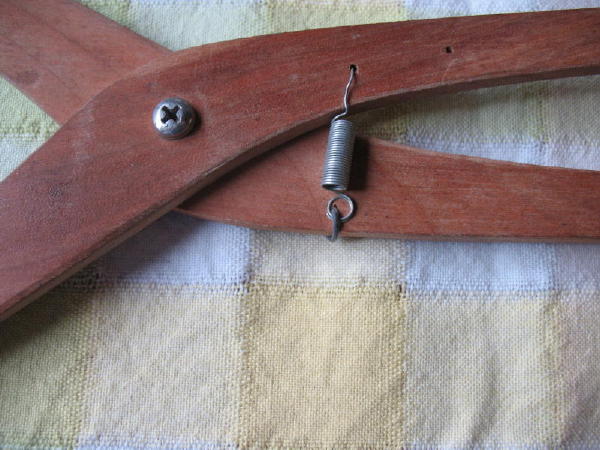
Close up of spring. Careful sanding is necessary before assembly to make
the gauging tips meet just right.
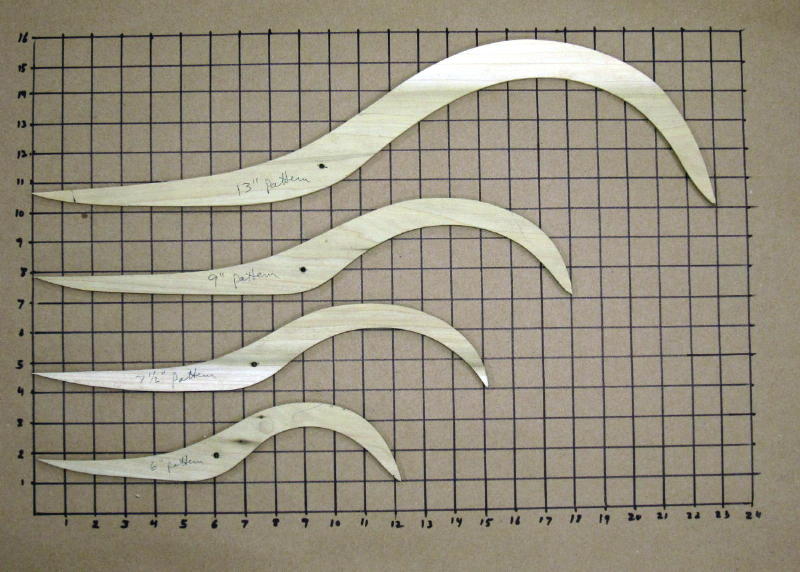
Here is a shot of caliper patterns on a 1" grid. The curves
need not be exact to make this most functional tool.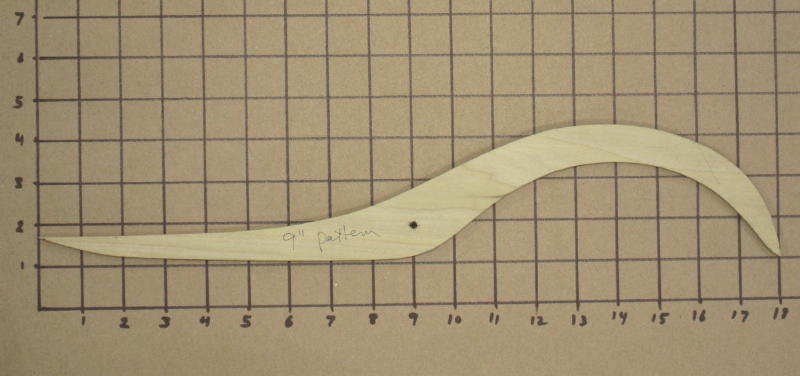
the 9" throat caliper I use the most
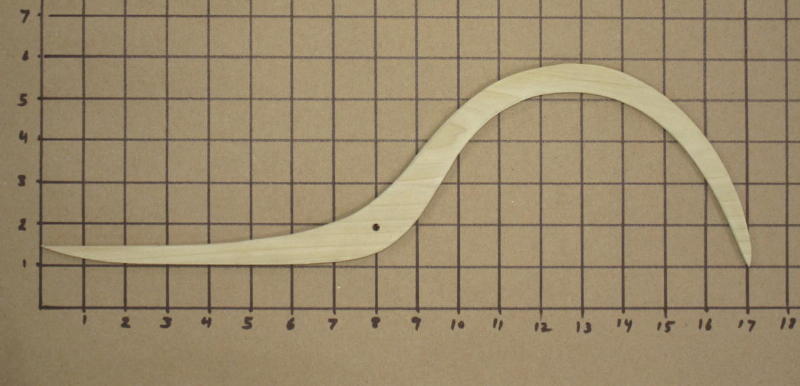
the pattern for a 9" deep throat caliper
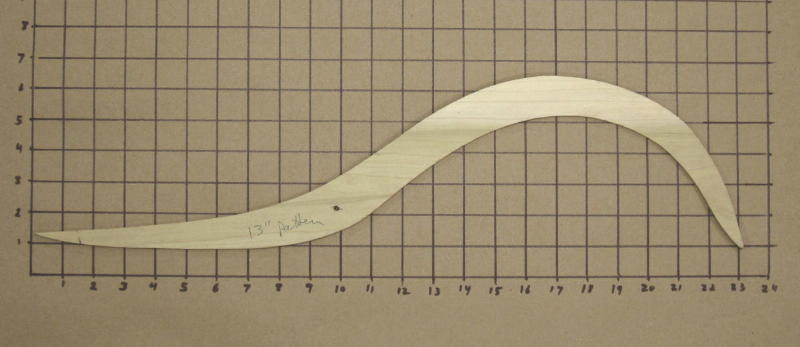
the 13" caliper, good for larger bowls and most of a globe
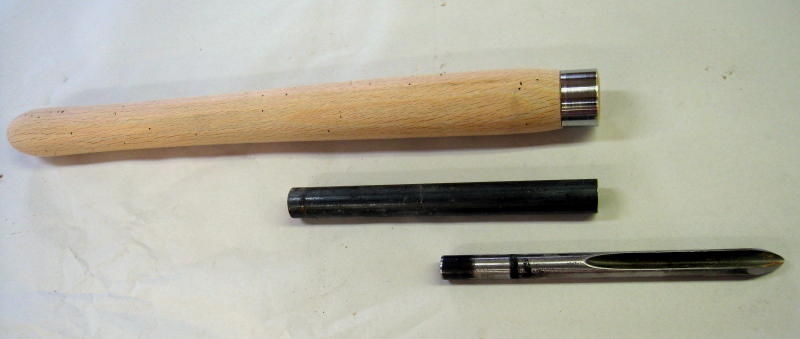
The Gouge Extender
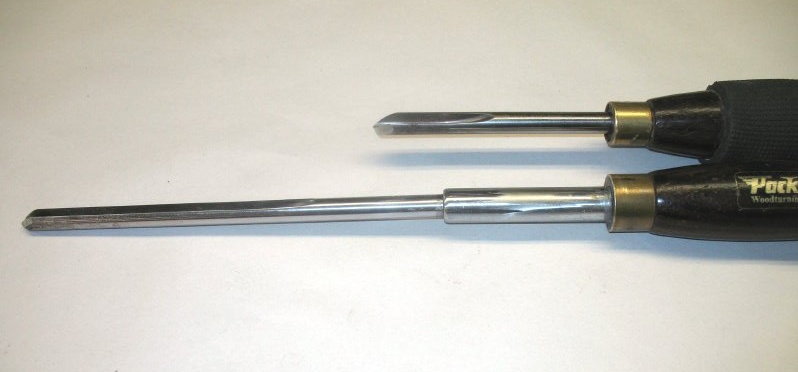
A half inch diameter gouge with extension, with worn one beside for
comparison
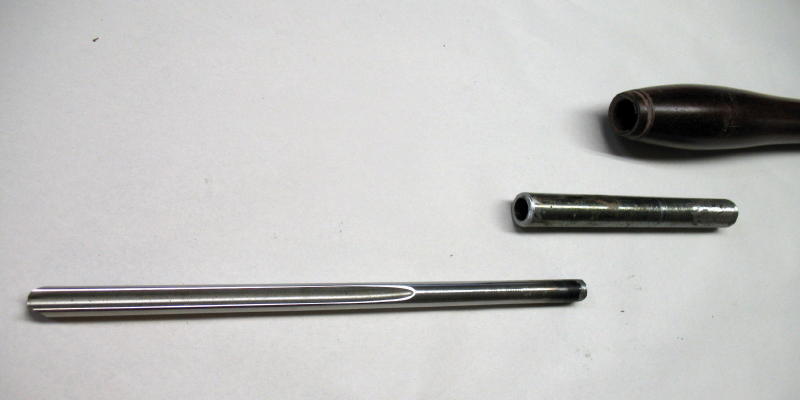
The gouge extension before assembly. 3/4" cold rolled steel bar
stock has 1/2" hole drilled 2 " into one end.
Medium CA glue firmly bonds extension to
wood handle. Thin CA is run downthe gouge into the extension.
A
propane torch will break that bond loose to replace the gouge.
This is 7/8" stock for a 5/8" gouge. The home turned handle is too thick
for comfort.
Boring Bars for Globes and Deep Bowls
Sometime back in the early 1980's I was introduced
to the Thompson boring bar at a workshop with David Ellsworth.
I went home and made one for myself with 36" of 1" cold rolled steel
and a hacksaw (bottom tool below). I turned a lot of deep
globes with it, and had a 3/4" dia. made to compliment it.
Twenty years later I bought a flat bar version made by Bob Vaughan
(top tool below), and found it most steady. So I adapted
the slotted bold idea to some 3/4" x 1 1/4" flat stock, and came up
with the tool in the middle below. Denny Martin, a turner and
machinist in our local club, made me two more sizes of this tool.
They really work well, especially using a prop stick below the right
hand to hold the tool level with only downward pressure.
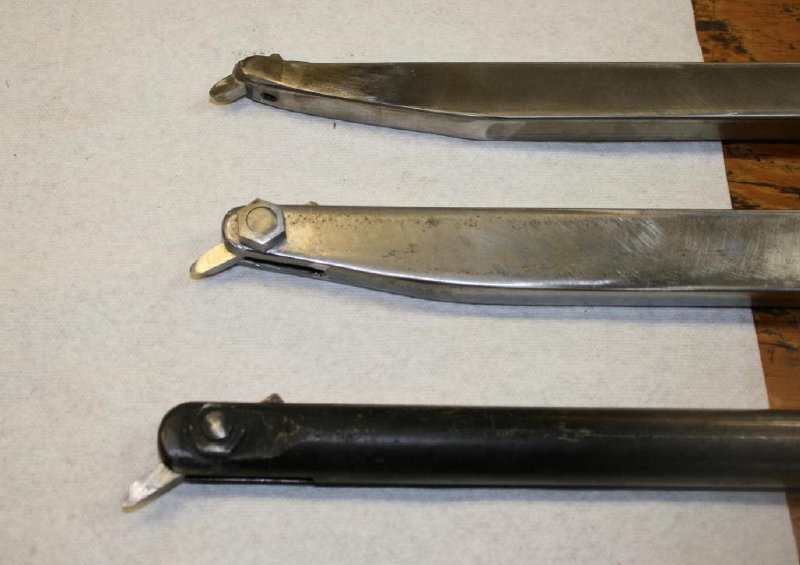
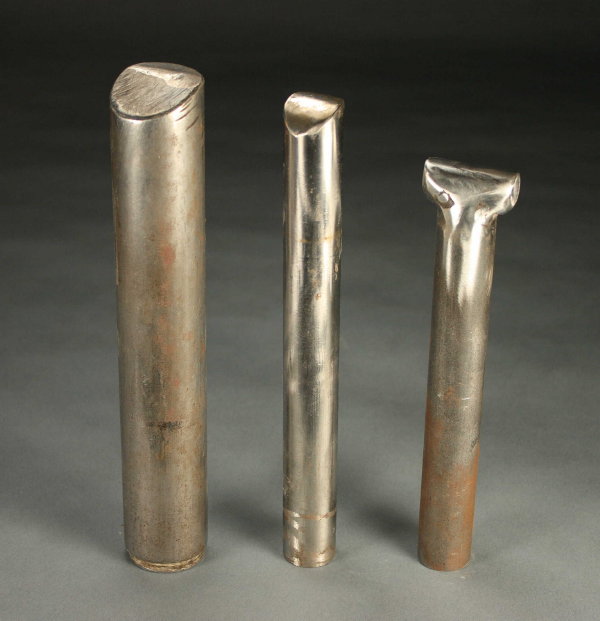
Three versions:
Bottom - 1" round stock, hand sawn slot, Thompson Tool style, 1983
Middle - 3/4" x 1 1/4" stock, 2008 version, power hacksaw slot, 2008
Top - Bob Vaughan version adjusted to 35 deg. angle, square hole for tool bit,
tiny allen set screw, 2007
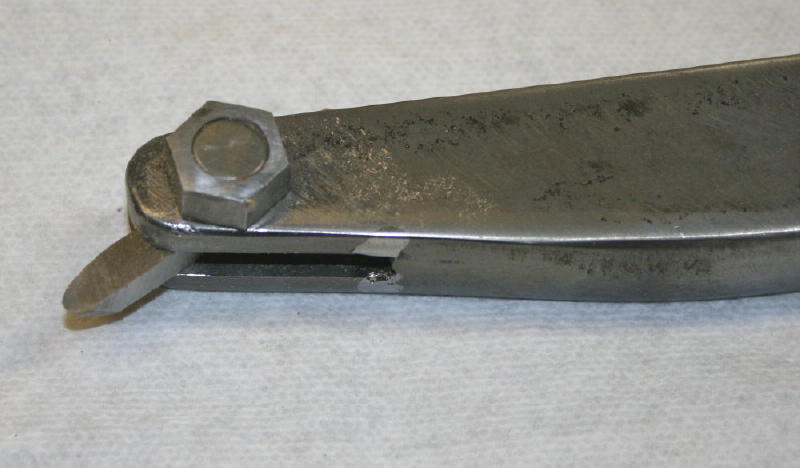
Close up of rectangular stock Thompson Tool. 1/4" sq. tool steel
big, 8% cobalt HS steel. The tip is ground
to an off center fingernail
shape.
This allows you to make a wide stock removal shaving with the right hand side
while,
or a finer final skimming cut with the center or left side.
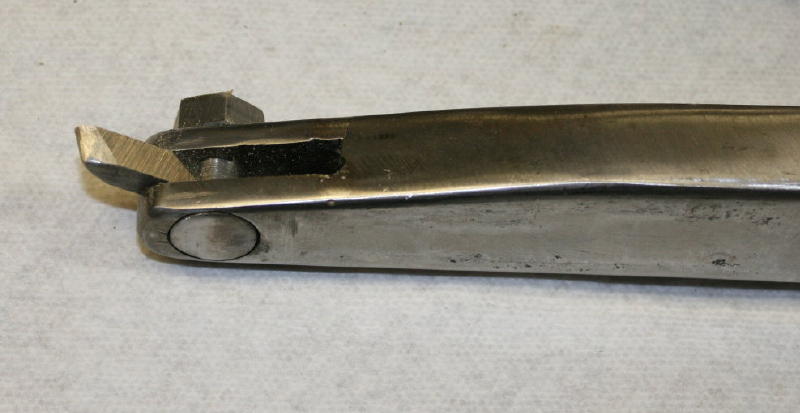
Bottom of tool, showing tapered
head of split bolt carefully ground and seated to be flush for smooth removal
from spinning bowl.
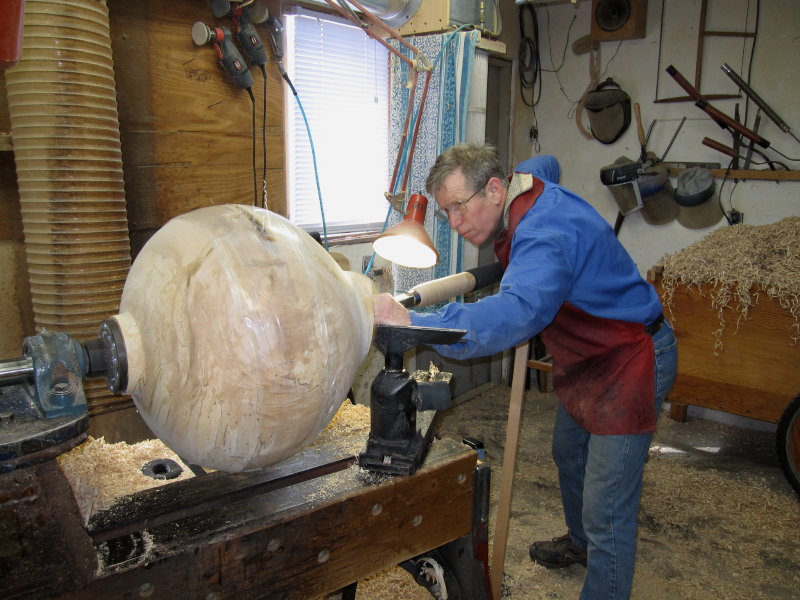
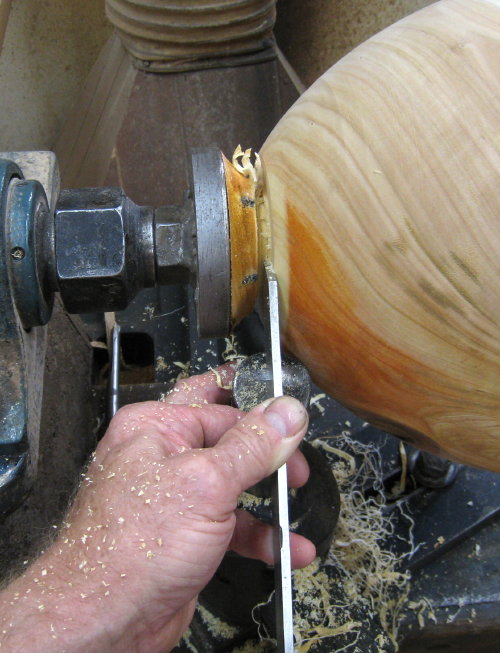
Using the boring bar with a prop stick. My hand wraps around
the tool handle and grips the prop stick.
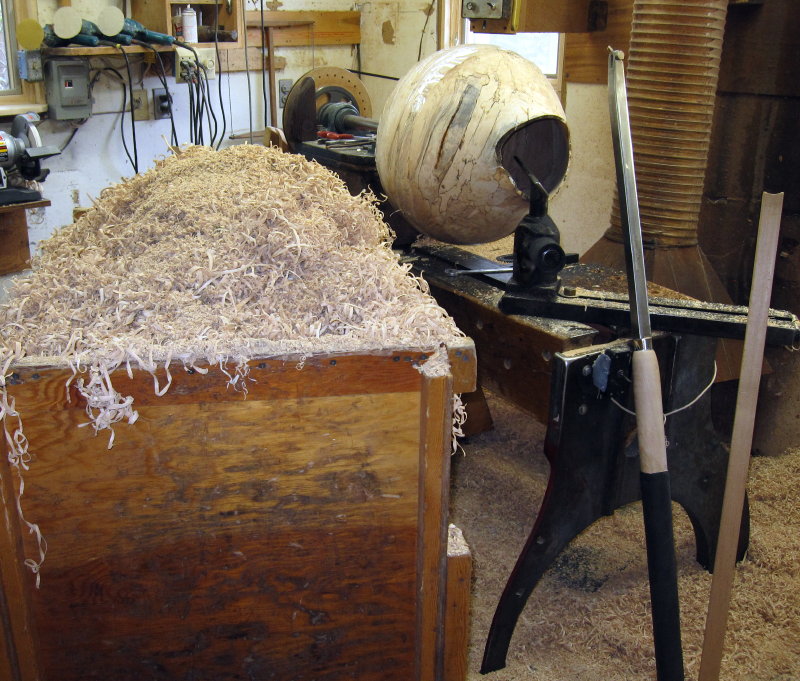
The boring bar, prop stick, and cart of shavings that came out of
the bowl bit by bit. The toolrest is out of position for the
photo.
The Parting Tool Post
You can make a custom tool rest from a single post of your tool rest post
diameter,
with a bevel on one side. Mine is 1 1/2" diameter, but the 1"
works great too.

With the post up close, a pointed gouge can remove a lot of material fast to
provide a relief undercut up to the screws.
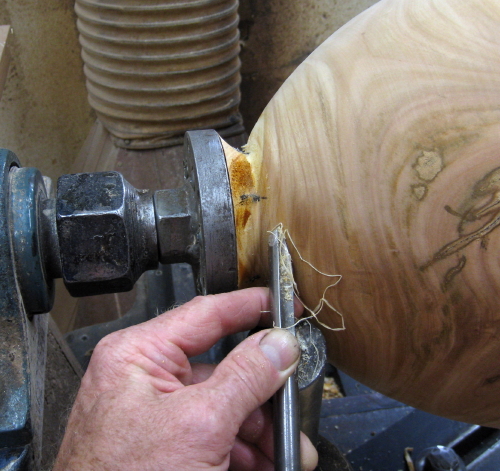
One can use a small gouge to make fine shearing cuts trimming the
base of the bowl down
to a smaller diameter. down.The post in this position was used with a 3/8" gouge with a sharp
fingernail
grind to trim down
the mounting stock to the left of the parting tool slot,
before the parting tool
was used.
With the post up close and slightly to the right of the slot you get good
support for the parting tool.

Here is the post in 1" stock for my 1642 lathe.
And are the three posts, with one on the right widened to 1 1/2" by welding
a rod across the top.
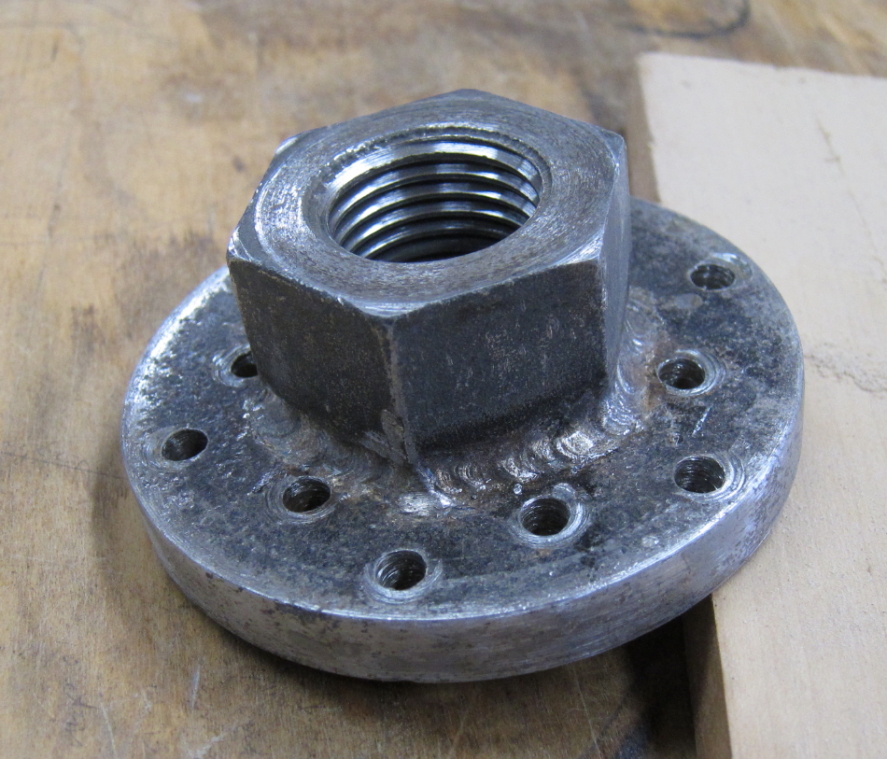
The Faceplate
I make my own faceplates, finding them much sturdier than any cast iron or milled aluminum ones on the market. I've made them for years, starting with a set with 1" x 8tpi thread nuts, then making a new set with 1 1/4" x 8 tpi nuts to match my "new" Powermatic, and then I made a new adaptor from 1 1/2" to 1 1/4" thread for my big lathe. I now use the 1 1/4" faceplate almost entirely, as it will handle an 18-20" bowl with comfort and more stability than the 1" thread. My friend Elbert Dale made a set of 7 for me, much better than I could with his superior welding skills. I have two 5" faceplates with 1 1/2" x 8tpi nuts for the huge bowls. But they are awkward to work with.
The basic faceplate is 1/2" thick plate steel cut 4" diameter.
I also have a set of 3" diameter ones out of 3/8" steel that Denny
Martin had cut by someone using a laser machine. These are
noticeably smaller and lighter and are only good for small bowls.
My original faceplates had 1/4" diameter holes drilled in them.
This gives some play with #12 screws, allowing me to angle them
inward as I drive them into the blank, creating a toenail effect
that I am convinced holds the bowls better, plus moving the tips
farther towards the center of the bowl, more out of the way when you
undercut the bowls and find out if you left enough room while
hollowing. Over time the machine screws wallowed out the
holes, permitting even steeper toenails. Elbert Dale took this
fact and drilled the holes in his faceplates at a 10 deg. angle.
This aims you the right way, but is not absolutely necessary.
When you go to #14 screws with the biggest bowls the added angle is
helpful.
No matter whether the plate was cut with a laser or a cutting torch,
it will need truing up after the faceplate is finished to give a
smooth and easy to use tool.
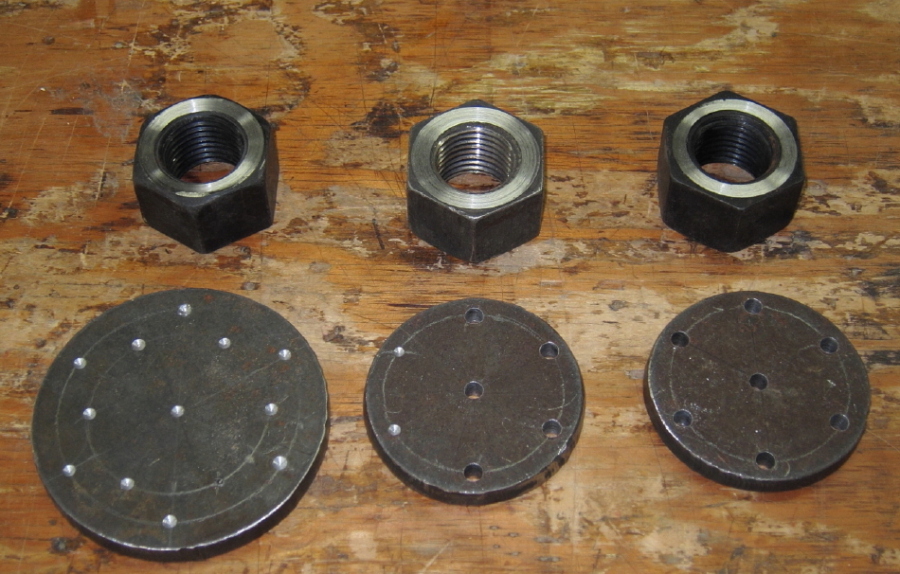
Here is a set of nuts ready to be welded to the plates. Note
the layout lines on the left one, the one pnunched hole center still
visible on the inner circle, and all the rest pre-drilled with a
sharp 3/16th" bit. On the center plate five of the holes are
drilled through with the 1/4" bit. The center hole is nice to
peek through when you are placing the faceplate onto a blank that
has crossed lines for location.
I bought a set of nuts locally that turned out to not be
threaded true, so I had to mount each on the lathe and turn them
true with a carbide tool bit (www.mscdirect.com/product/72660244?fromRR=Y)
in my boring bar . You true up the outer face, flip the nut,
true that face up, flip it back, and re-true the first face to match
the second, and you have a decent nut. The ones from
McMaster-Carr did not need truing. (www.mcmaster.com/#hex-nuts/=a00n46)
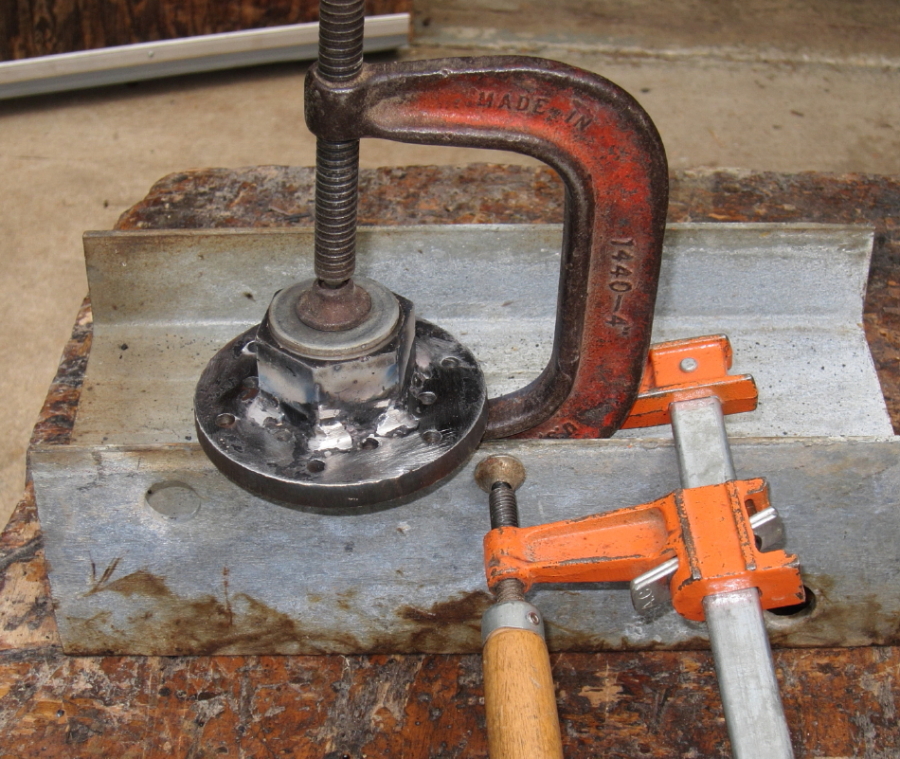
Here the nut is clamped to the faceplate, with the tips of the nut
centered between the inner circle of holes. As you can see I
have only welded the parts that do not interfere with the holes.
I center the nut visually over the center hole, then measure each of
the size points to the outer perimeter for final accuracy.
Here is a finished faceplate made by Elbert Dale. He ground a
deep undercut on the nut so he could weld continuously around out of
the way of the inner circle of holes. You can see that the angled
machine screws dig into the outer side of each hole but leave the
inside towards the nut unscarred. I typically use 1 1/4" #12
screws for the outer circle, and 1" long for the inner, which are
all that is left holding the bowl for sanding. I remove the
outer ring to undercut the bowl as much as possible and to greatly
reduce the chance of checking.
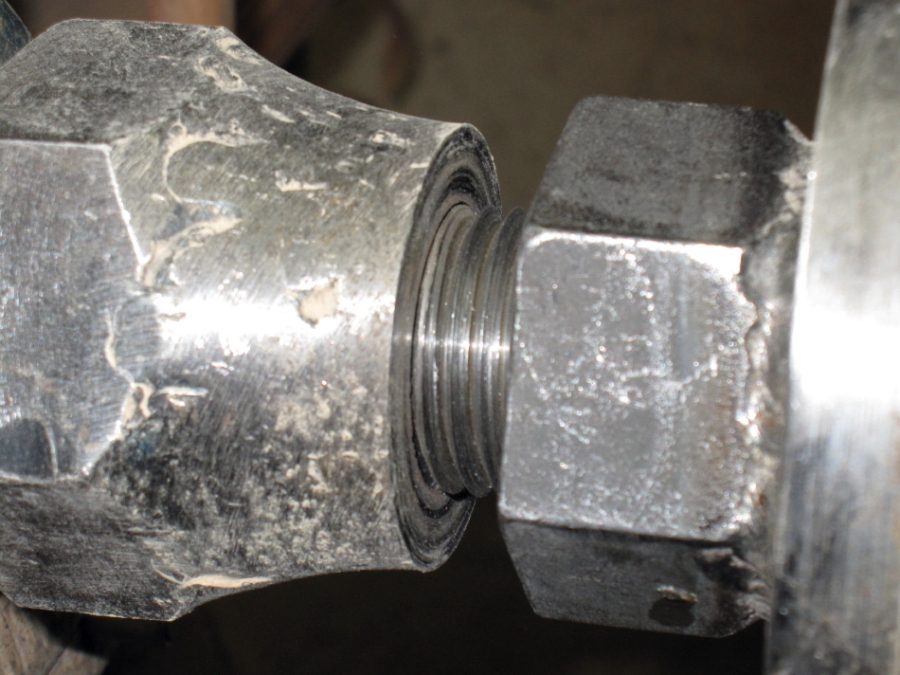
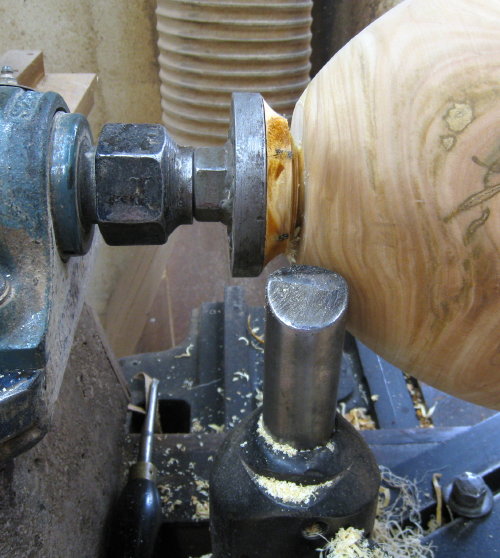
It is the face of the nut about to seat on the shoulder of the lathe
spindle. That what makes it firm. The threads are loose and
easy to turn. A bowl simply spun on by hand, or even an empty
faceplate, will lock firmly enough against the spindle to require a
wrench to break it away. I only run the lathe in reverse for
sanding, never for cutting, and I've never had a faceplate work
loose that was seated.
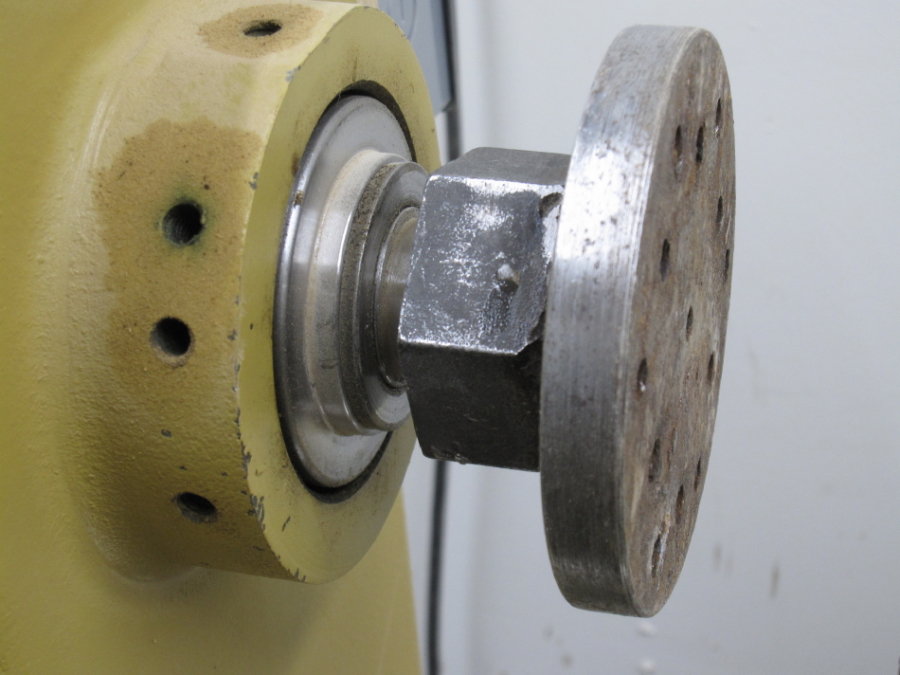
Here is the faceplate on the Powermatic. Notice the washer
super-glued to the spindle shoulder. Because a Powermatic has
that slot cut for a locking screw, it is too deep for the face of a
1 1/4" nut to reach the shoulder and provide a firm lock. The
washer is only 1/8" thick, but that is enough.
Having a set of faceplates allows me to turn 10-15 bowls before I stop to sand them. I leave the faceplate on the turned bowl until it is sanded. I do have to part it down to just over 1" diameter right away before setting it aside, so it won't crack while the first stage drying is going on.
Although it takes a little time, if you have a welder and access to
some plate steel, you will be well satisfied with homemade
faceplates.
The Do Rag to keep shaving out of your hair.
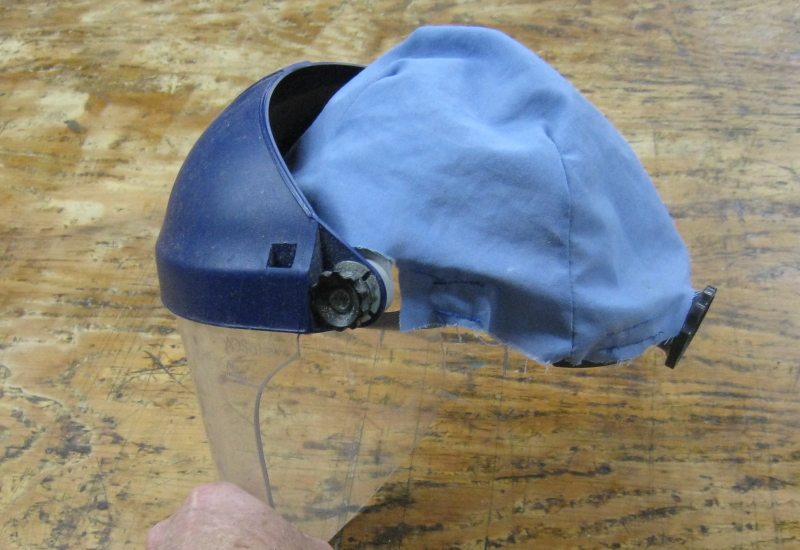
I have fitted a cloth head covering to my face mask to keep the
shavings and dust out of my (thinning) hair.
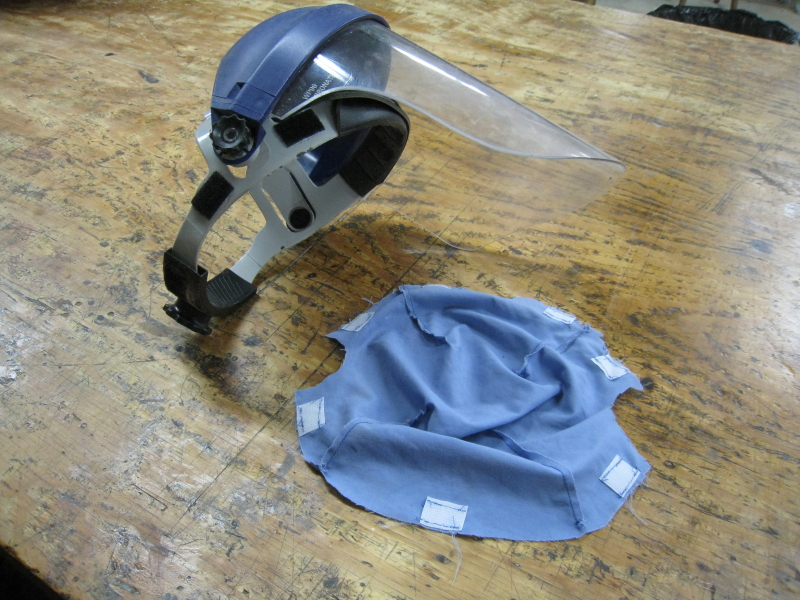
Here is the crenellated cloth with velcro tabs sewn on.
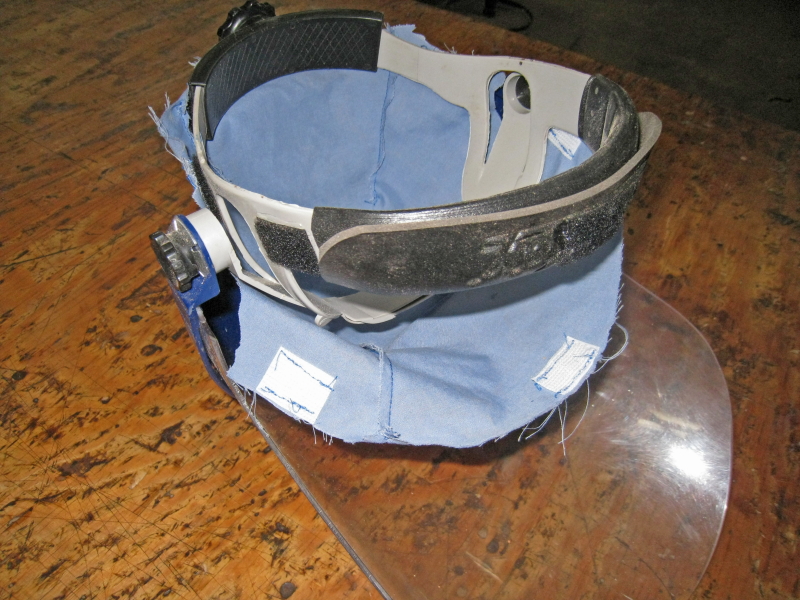
And here it is ready to fit to velcro tabs glued onto the face
shield head band.
I really love the relief this do rag gives me at the end of the day.